Customizing Message Display Styles
The IMKit SDK controls message display styles in the chat UI through "Message Display Templates." Apps can modify display templates for specific message types as needed to achieve personalized message styling.
- The SDK provides default display templates for all built-in message types (see Message Type Overview). Apps can create custom templates to replace the defaults.
- Custom message types (see Custom Message Types) don't have default display templates. If an app needs to display custom message types in the chat UI, it must create corresponding display templates.
To display custom message types in the chat UI, you must create corresponding display templates; otherwise, the SDK won't render them properly.
Modifying Message UI via Style Resources
You can replace IMKit's built-in style resources to adjust message bubble backgrounds, text colors, and font sizes—ideal for lightweight UI customization.
Replacing Message Bubble Backgrounds
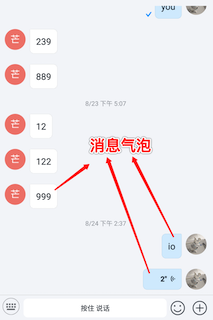
IMKit displays messages with bubble backgrounds: blue for sent messages and white for received ones.
The base class BaseMessageItemProvider references two 9-patch files. To customize bubble styles, create files with the same names in your app's res/drawable-xhdpi/ directory to override the default .9.png resources.
| Resource Path & Name | Description |
|---|---|
| res/drawable-xhdpi/rc_ic_bubble_right.9.png | Right bubble (sent messages) |
| res/drawable-xhdpi/rc_ic_bubble_left.9.png | Left bubble (received messages) |
Adjusting Text Message Font Colors or Sizes
Customize font colors or sizes for built-in text messages in IMKit.
Copy the rc_translate_text_message_item.xml file from IMKit's source code to your app's res/layout directory, then modify the font size and color values.
For SDK versions < 5.2.2, use rc_text_message_item.xml instead.
Replacing Default Built-in Message Templates
IMKit encapsulates display templates for each message type, all inheriting from BaseMessageItemProvider. For advanced customization of built-in messages, create a custom template by extending BaseMessageItemProvider and register it with the SDK to override the default.
Default Built-in Message Templates
| Message Type | Template Class (Source Link) |
|---|---|
| TextMessage | TextMessageItemProvider.class |
| ImageMessage | ImageMessageItemProvider.class |
| HQVoiceMessage | HQVoiceMessageItemProvider.class |
| FileMessage | FileMessageItemProvider.class |
| LocationMessage | LocationMessageItemProvider.class |
| RealTimeLocationStartMessage | RealTimeLocationMessageItemProvider.class |
| SightMessage | SightMessageItemProvider.class |
| RichContentMessage | RichContentMessageItemProvider.class |
| GIFMessage | GIFMessageItemProvider.class |
| CombineMessage | CombineMessageItemProvider.class |
| InformationNotificationMessage | InformationNotificationMessageItemProvider.class |
| GroupNotificationMessage | GroupNotificationMessageItemProvider.class |
Step 1: Create a Custom Template
Here’s how to customize a text message display template:
-
Create a custom layout file
my_text_message.xml:<?xml version="1.0" encoding="utf-8"?>
<TextView xmlns:android="http://schemas.android.com/apk/res/android"
android:id="@+id/my_text"
style="@style/TextStyle.Alignment"
android:layout_width="wrap_content"
android:layout_height="wrap_content"
android:padding="12dp"
android:textColor="@android:color/holo_green_dark"
android:textColorLink="@android:color/holo_red_dark"
android:fontFamily="sans-serif"
android:textSize="14sp"
android:maxWidth="223dp" /> -
Create a custom template class
MyTextMessageProviderextendingBaseMessageItemProvider<TextMessage>, implementing all abstract methods:public class MyTextMessageProvider extends BaseMessageItemProvider<TextMessage> {
public MyTextMessageProvider() {
mConfig.centerInHorizontal = true; // Center-align messages.
}
@Override
protected ViewHolder onCreateMessageContentViewHolder(ViewGroup viewGroup, int i) {
View textView = LayoutInflater.from(viewGroup.getContext()).inflate(R.layout.my_text_message, viewGroup, false);
return new ViewHolder(viewGroup.getContext(), textView);
}
@Override
protected void bindMessageContentViewHolder(ViewHolder viewHolder, ViewHolder viewHolder1, TextMessage textMessage, UiMessage uiMessage, int i, List<UiMessage> list, IViewProviderListener<UiMessage> iViewProviderListener) {
TextView textView = viewHolder.getView(R.id.my_text);
textView.setText(textMessage.getContent());
}
@Override
protected boolean onItemClick(ViewHolder viewHolder, TextMessage textMessage, UiMessage uiMessage, int i, List<UiMessage> list, IViewProviderListener<UiMessage> iViewProviderListener) {
return false;
}
@Override
protected boolean isMessageViewType(MessageContent messageContent) {
return messageContent instanceof TextMessage;
}
@Override
public Spannable getSummarySpannable(Context context, TextMessage textMessage) {
return new SpannableString(AndroidEmoji.ensure(textMessage.getContent()));
}
}
Step 2: Replace the Default Template
After creating a custom template, register it with the SDK to override the default template for the specified message type.
-
Example:
RongConfigCenter.conversationConfig().replaceMessageProvider(TextMessageItemProvider.class, new MyTextMessageProvider()) -
Method:
RongConfigCenter.conversationConfig().replaceMessageProvider(Class oldProviderClass, IMessageProvider provider)Parameter Description oldProviderClass Default template class name (refer to [Default Built-in Message Templates]). provider Custom template object.
Step 3: Configure Template Properties
The base class BaseMessageItemProvider uses MessageItemProviderConfig to control template styling. Modify these properties in your template's constructor via the mConfig object:
| Property | Description | Default |
|---|---|---|
| showPortrait | Whether to show avatars. | true |
| centerInHorizontal | Whether to center-align messages horizontally. | false |
| showWarning | Whether to show send-failure warnings. | true |
| showProgress | Whether to show send progress. | true |
| showSummaryWithName | Whether to show sender names in conversation previews. | true |
| showReadState | Whether to show read receipts in one-to-one chats. | false |
| showContentBubble | Whether to display message bubbles. | true |
Example: Center-align messages and enable read receipts in one-to-one chats:
public MyCustomMessageProvider() {
  mConfig.showReadState = true; // Enable read receipts.
  mConfig.centerInHorizontal = true; // Center-align messages.
}