Quick Start (Swift)
This tutorial helps developers quickly understand and master the basic integration process and core capabilities of the IMKit SDK (RC Chat UI library). Through this guide, you'll complete the full workflow of importing the IMKit SDK via Swift, initializing it, establishing connections, displaying conversation lists and chat UIs, and testing message sending/receiving.
Environment Requirements
- Xcode 11 or later
- iOS 9.0 or later
- Swift 5.0 or later
- CocoaPods 1.10.0 or later (if using CocoaPods integration). Note: IMLib SDK versions after 5.1.1 switched to XCFramework format, which requires CocoaPods 1.10.0+ for full support. See Knowledge Base.
To install CocoaPods, refer to CocoaPods Installation.
Prerequisites
- Register a developer account on the RC Console. Upon successful registration, the console automatically creates an application in your development environment.
- Obtain your AppKey from the Basic Info page in the console. You can view application details including App Key, App Secret, and data center location.
To create applications manually, see How to Create an App and Obtain App Key/Secret.
Each app has two distinct App Keys for development and production environments, with data isolation between them. Before official launch, switch to the production App Key for full testing. :::
Importing the SDK
RC supports both remote dependency via CocoaPods and local XCFramework integration. This example demonstrates CocoaPods remote dependency.
Starting from version 5.16.1, IMKit SDK also supports Swift Package Manager integration.
CocoaPods Integration
-
If your project lacks a
Podfile, runpod initin your project root directory, then add to the generated file:pod 'RongCloudIM/IMKit', '~> x.y.z'tipReplace
x.y.zwith the actual version number. Check the latest version on the RC SDK Download Page or viapod search RongCloudIMafter runningpod repo update. -
Run in terminal:
pod installtipIf encountering version conflicts, run
pod repo updatebeforepod install. -
Open the generated
.xcworkspacefile in Xcode.
Initializing the SDK
Import the SDK header:
import RongIMKit
Initialize IMKit SDK using your AppKey. For Beijing Data Center (default), no RCInitOption configuration is needed:
func application(_ application: UIApplication, didFinishLaunchingWithOptions launchOptions: [UIApplication.LaunchOptionsKey: Any]?) -> Bool {

    let appKey: String = "Your_AppKey" // example: bos9p5rlcm2ba
    let option: RCInitOption? = nil
    RCIM.shared().initWithAppKey(appKey, option: option)

    return true
}
For global data centers, specify the AreaCode:
func application(_ application: UIApplication, didFinishLaunchingWithOptions launchOptions: [UIApplication.LaunchOptionsKey: Any]?) -> Bool {

    let appKey: String = "Your_AppKey" // example: bos9p5rlcm2ba
    let option: RCInitOption? = RCInitOption.init();
    option?.areaCode = .SG;
    RCIM.shared().initWithAppKey(appKey, option: option)
    return true
}
For IMKit SDK development versions below 5.4.2 or stable versions ≤5.3.8, use initWithAppKey directly. See Initialization.
Connecting to RC IM Server
Token is the unique authentication credential corresponding to user IDs. Clients must establish an IM connection using a valid Token before using RC services.
In production, obtain Tokens via your application server calling IM Server API. See User Registration.
For testing purposes, use the Console's Polaris developer tools to call the Get Token API. Example response for userId=1:
HTTP/1.1 200 OK
Content-Type: application/json; charset=utf-8

{"code":200,"userId":"1","token":"gxld6GHx3t1eDxof1qtxxYrQcjkbhl1V@sgyu.cn.example.com;sgyu.cn.example.com"}
- Set connection status listeners for real-time monitoring. Recommended to set listeners after SDK initialization but before connection. See Connection Status Monitoring.
import UIKit
import RongIMKit

class ViewController: UIViewController {

override func viewDidLoad() {
    super.viewDidLoad()
    connectRongcloud()
    }

func connectRongcloud() {
/*
Set connection delegate before connecting.
*/
RCIM.shared().addConnectionStatusDelegate(self)
}
/*
    IMKit Connection Status Delegate
    */
extension ViewController: RCIMConnectionStatusDelegate {
func onRCIMConnectionStatusChanged(_ status: RCConnectionStatus) {

    }
}
}
- Connect using
connectWithToken. Note: IMKit SDK has auto-reconnect; call connect once per app lifecycle. See Connection.
RCIM.shared().connect(withToken: "your_token") { dbErrorCode in
        // Database ready

} success: { (userId: String?) in
        /* Connection successful - navigate to conversation list */
        DispatchQueue.main.async { [weak self] in
        self?.openRongcloudConversationList()
        }

} error: { (connectStatus: RCConnectErrorCode) in
    if connectStatus == .RC_CONN_TOKEN_INCORRECT {
        /* Get new token from app server and reconnect */
    } else {
        /* Handle other connection errors */
    }
}
RCConnectErrorCode defines possible connection error codes:
| Error Code | Value | Description | Solution |
|---|---|---|---|
| RC_CONN_TOKEN_INCORRECT | 31004 | Invalid Token. Typically occurs when client SDK and app server use different App Keys. | Verify App Key consistency. |
| RC_CONN_TOKEN_EXPIRE | 31020 | Token expired. | Request new Token from app server. |
| RC_CONNECT_TIMEOUT | 34006 | Auto-reconnect timeout. Occurs in no-network environments. | Manual reconnect |
| RC_CONN_APP_BLOCKED_OR_DELETED | 31008 | AppKey blocked | Check AppKey status |
| RC_DISCONN_KICK | 31010 | Kicked offline after successful connection | Show logout prompt |
| RC_CONN_OTHER_DEVICE_LOGIN | 31023 | Logged in on another device | Show multi-device login alert |
| RC_CONN_USER_BLOCKED | 31009 | User banned | Show ban notice |
| RC_CLIENT_NOT_INIT | 33001 | SDK not initialized | Call Init first |
| RC_INVALID_PARAMETER | 33003 | Invalid parameters | Verify parameter types/values |
| DATABASE_ERROR | 33002 | Database error | Check userId for special characters (max 64 chars, alphanumeric only) |
RCConnectionStatus defines connection status codes:
| Status Code | Value | Description |
|---|---|---|
| ConnectionStatus_KICKED_OFFLINE_BY_OTHER_CLIENT | 6 | Kicked by another device |
| ConnectionStatus_Timeout | 14 | Auto-connect timeout |
| ConnectionStatus_TOKEN_INCORRECT | 15 | Invalid Token (wrong or expired) |
| ConnectionStatus_DISCONN_EXCEPTION | 16 | Disconnected (user banned) |
Displaying Conversation List
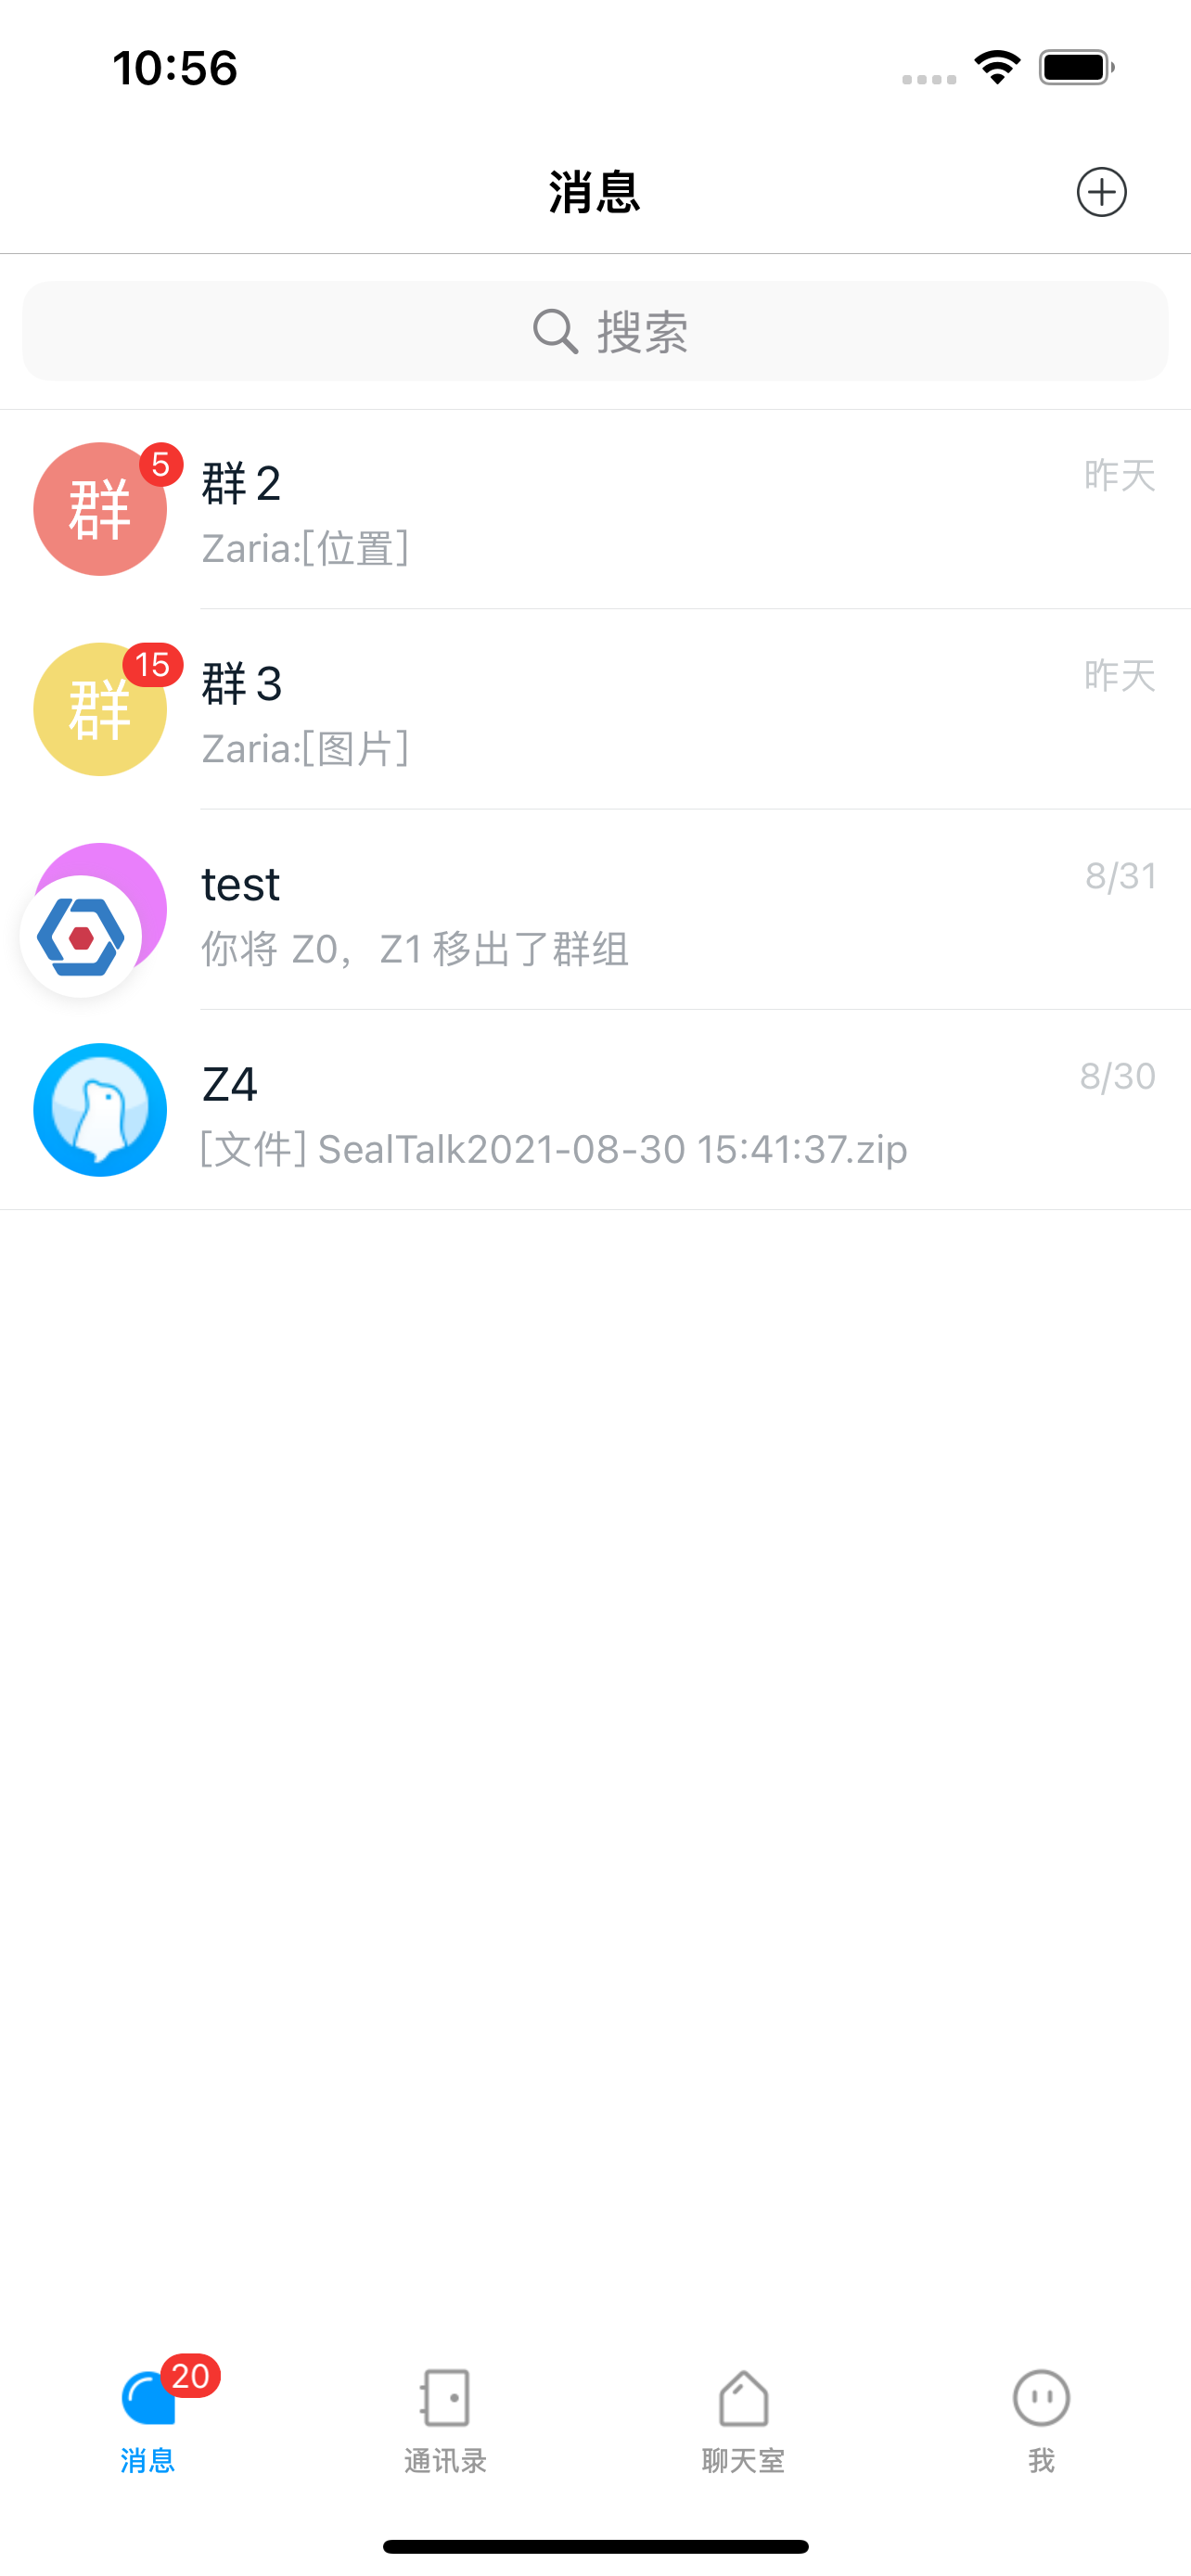
IMKit SDK provides default conversation list UI (RCConversationListViewController). After successful connection, navigate to this view. For first-time users, the list may appear empty until receiving messages.
Example navigation implementation (adapt if already using navigation controllers):
private func openRongcloudConversationList() {
    let displayConversationTypeArray = [
        RCConversationType.ConversationType_PRIVATE.rawValue,
        RCConversationType.ConversationType_GROUP.rawValue,
    ]
    let collectionConversationType = [
        RCConversationType.ConversationType_SYSTEM.rawValue
    ]
    guard let conversationList = RCConversationListViewController(displayConversationTypes: displayConversationTypeArray,
                                                                  collectionConversationType: collectionConversationType) else { return }
    let naviVC = UINavigationController(rootViewController: conversationList)
    naviVC.modalPresentationStyle = .fullScreen
    present(naviVC, animated: false)
}
For customization, subclass RCConversationListViewController (e.g., RCDChatListViewController).
//
//  RCDChatListViewController.swift
//  RongcloudApplication
//

import Foundation
import RongIMKit

class RCDChatListViewController: RCConversationListViewController {

}
Details: Conversation List, Conversation UI.
Testing Messaging
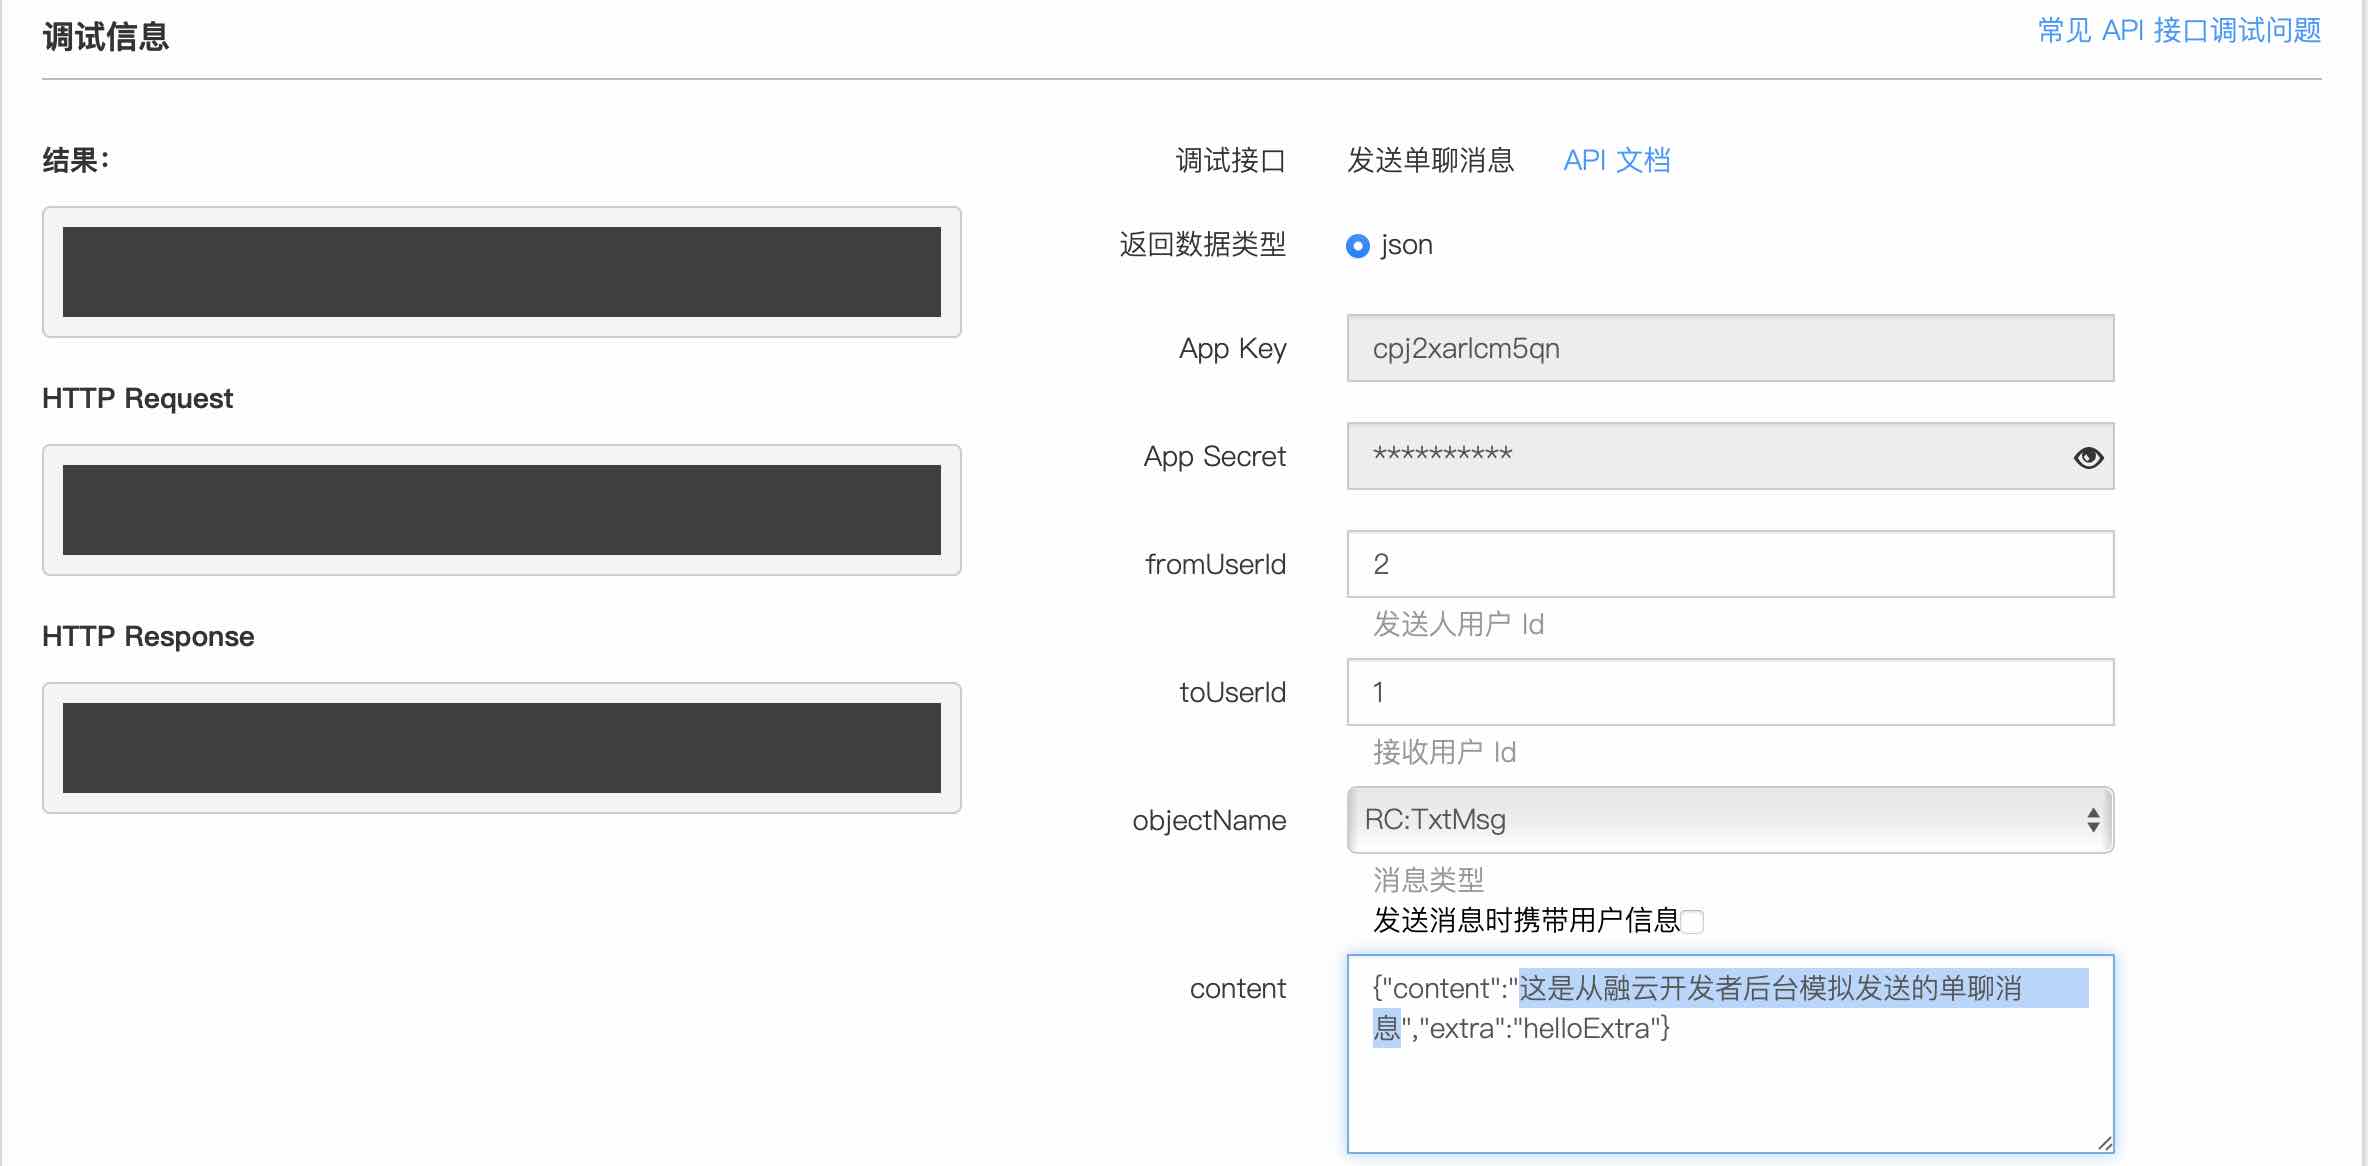
RC enables messaging by simply specifying the recipient's userId. For testing, use Console's Polaris tools to send test messages.
-
Navigate to IM Server API Debug in Console.
-
Under Message Service, find Send Private Message.
Example: Send text message from userId=2 to userId=1.
-
Received messages automatically appear in the conversation list. Tap to enter chat UI.
 tip
tipScreenshots show SealTalk UI. Default IMKit implementation shows basic list without search/Tab Bar. For nicknames/avatars, implement user info providers (see User Overview).
Next Steps
This completes basic IM integration. Explore these advanced topics:
- User Overview: Avatar/nickname display
- Group Overview: Group chat implementation
- Conversation UI: Chat UI customization